November 9 - January 24
Single View Drawing 7B and 8
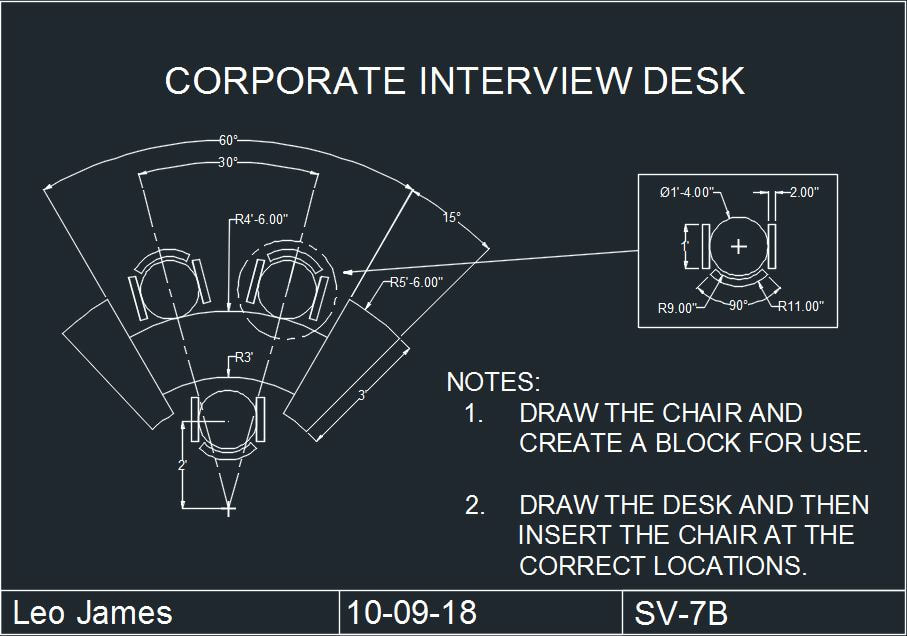
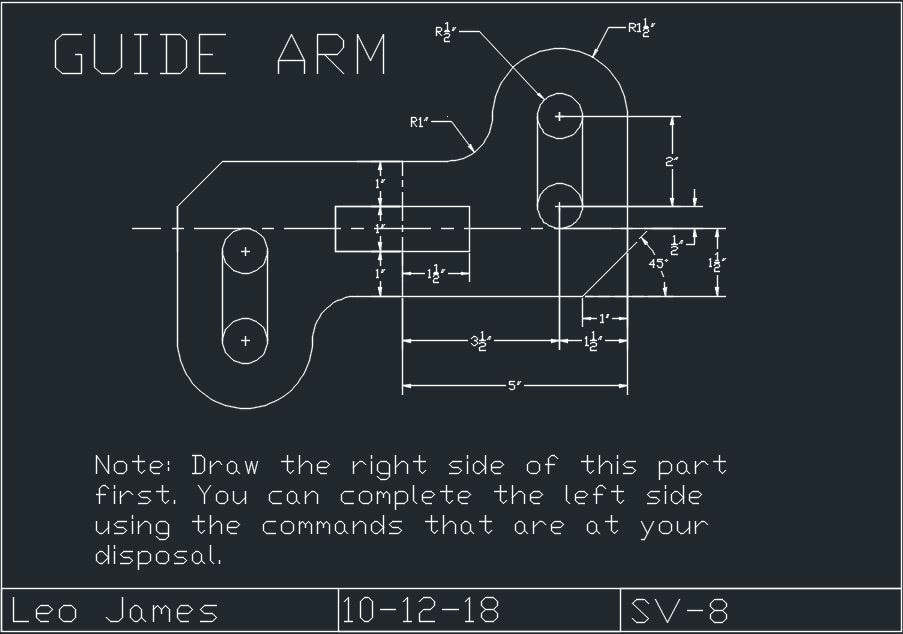
These drawings introduced a few new commands. In drawing 7B, we learned how to use the copy and rotate commands. We also learned how to group objects in order to copy and move the objects. In this drawing, we also learned how to trim objects at specific angles. In drawing 8, we learned the chamfer command, which allowed us to cut 2 lines at a specific angle and length from the corner. In this drawing, we also learned how to copy and rotate half of a drawing as to create the second half of the drawing.
Single View Drawing 10A and 11A

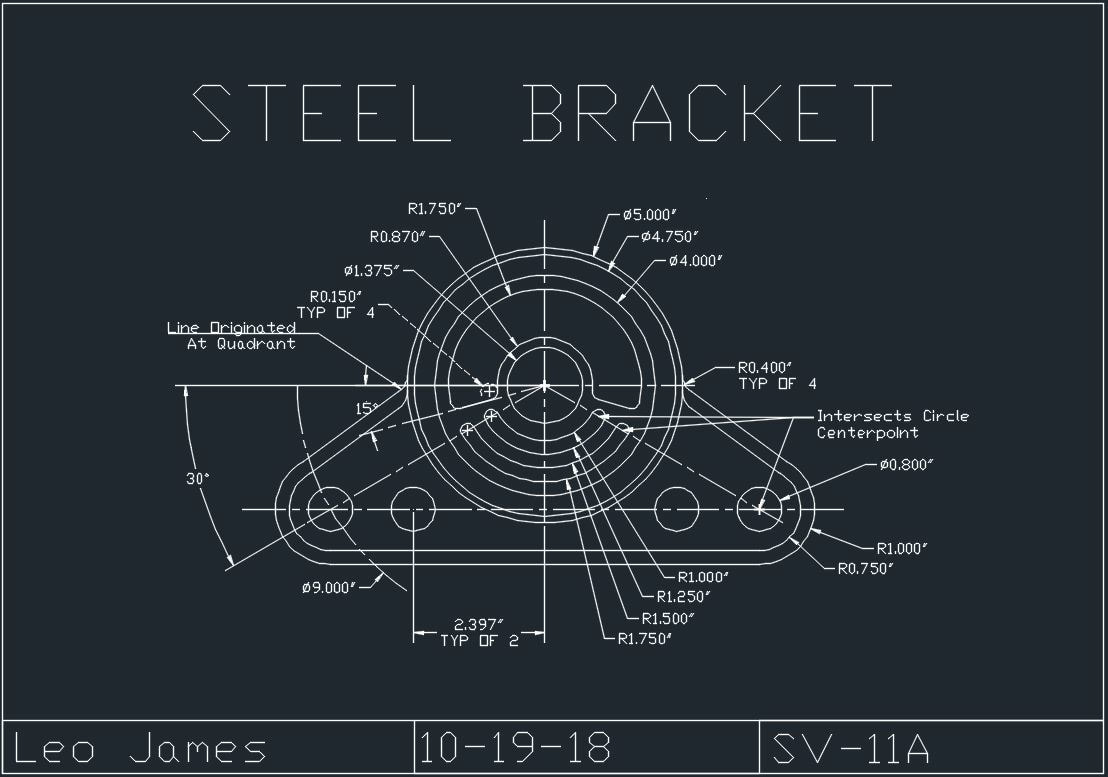
We didn't necessary learn any new commands in these drawing, more so we just honed our skill. In drawing 10A, we experienced having to create multiple slots and holes using a variety of commands. In drawing 11A, we had probably the most circles we ever encountered in a single drawing. This drawing made us trim lots of circles, both radius and diameter, as well as using the tan-tan-radius command.
Single View Drawing 12A and 13
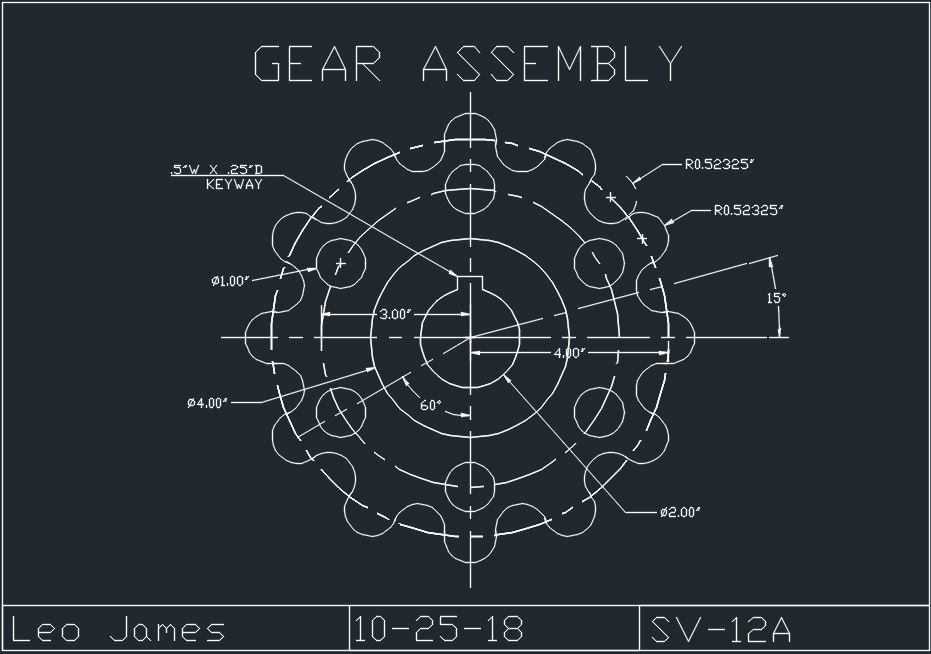
These two drawings introduced few new commands but more difficult scenarios. In drawing 12A, we used the array command in order to save time when doing the outside of the drawing. In drawing 13, an understanding of the relationship between each of the angles is necessary in order to complete the part. 13 didn't necessarily introduce any new commands but is in itself quite difficult due to the angles.
Single View Drawing 15B and 17
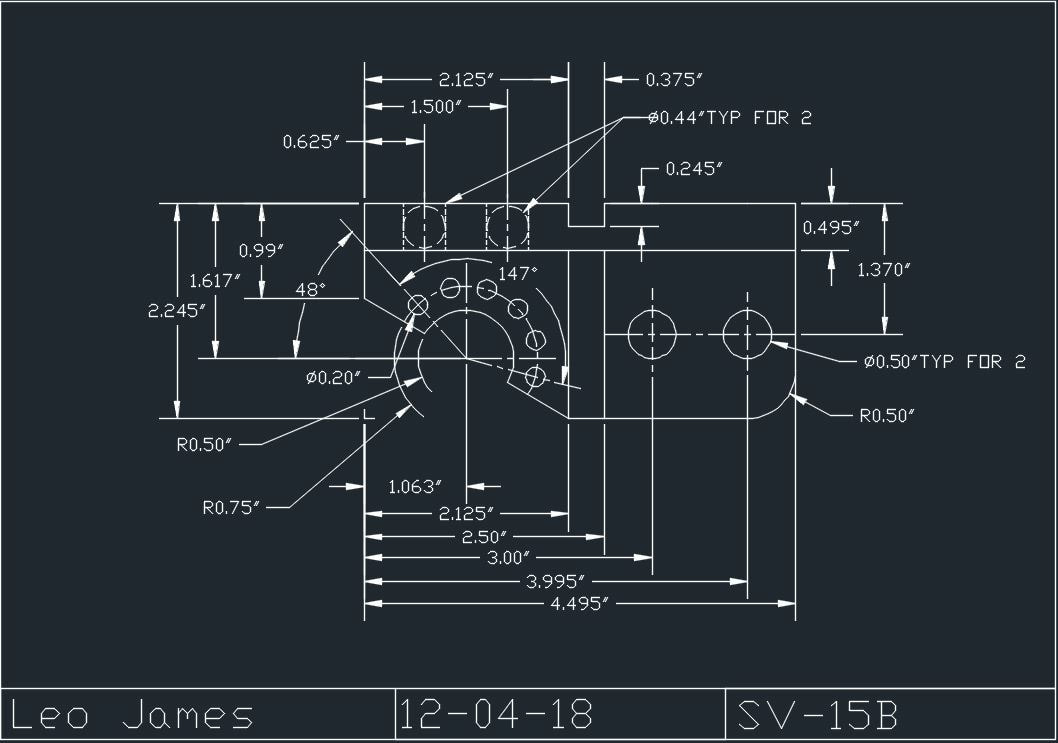

In drawings 15B and 17, there were no new commands that were introduced. In drawing 15B, we used a combination of numerous previous commands we learned, like a partial array and chamfer. Drawing 17 is similar to drawing 13 in the sense that it is crucial that you understand exactly how the angles work together. It is very easy to go astray on this drawing, so it is crucial to dimension this drawing as you go along to check your work.
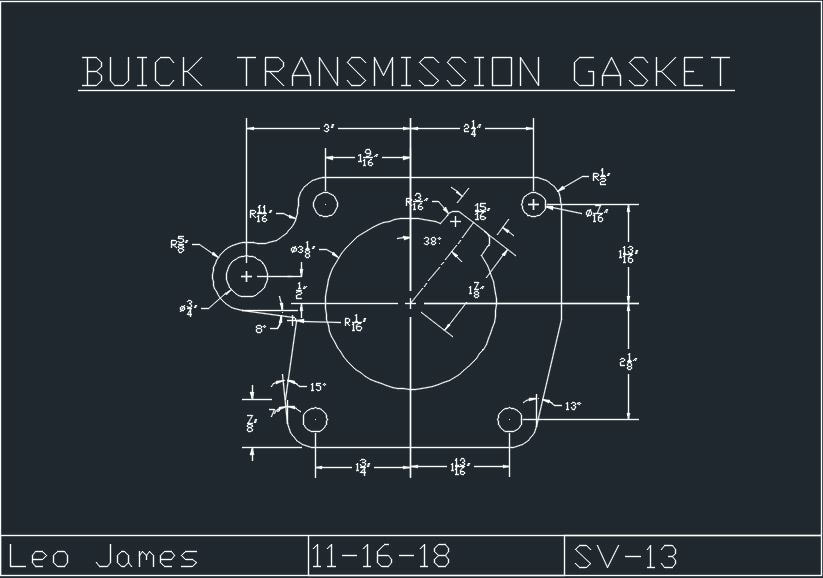
Term 2 Test (Single View Drawing 26)
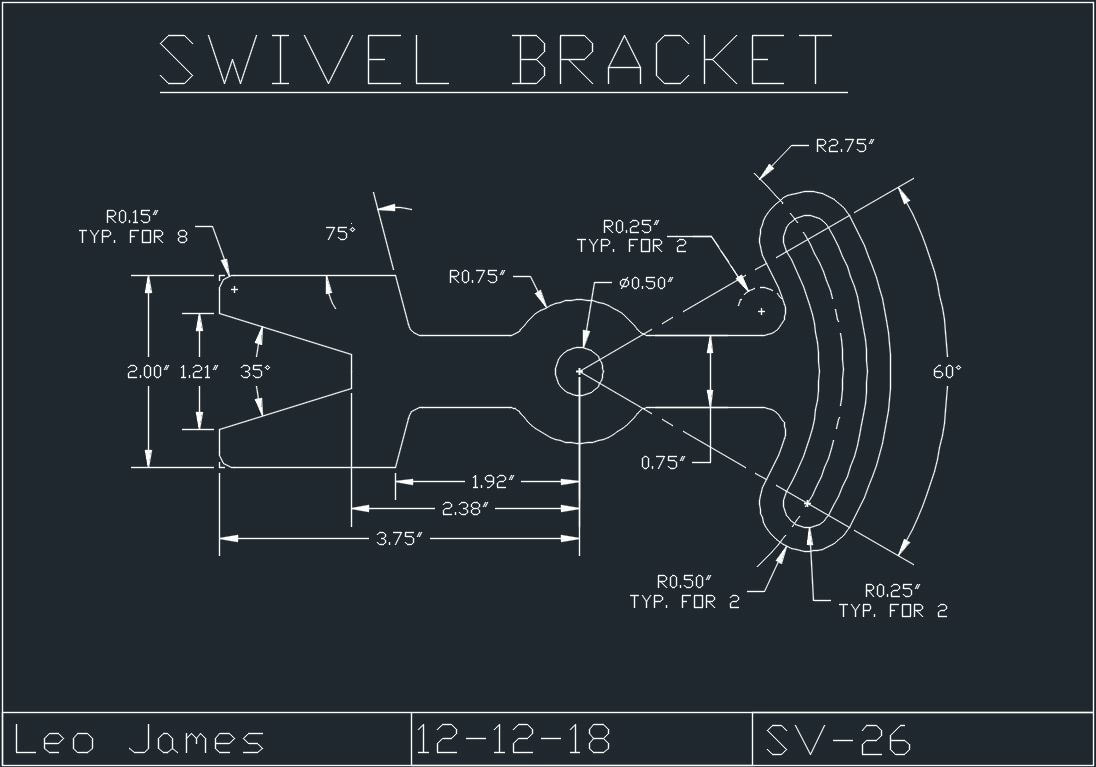
This drawing was used as a test for Term 2, so it is a collection of a lot of skills we have learned thus far. This drawing used chamfering and the trim commands to complete. The drawing in itself isn't very difficult, I finished it within half a period with no issues.
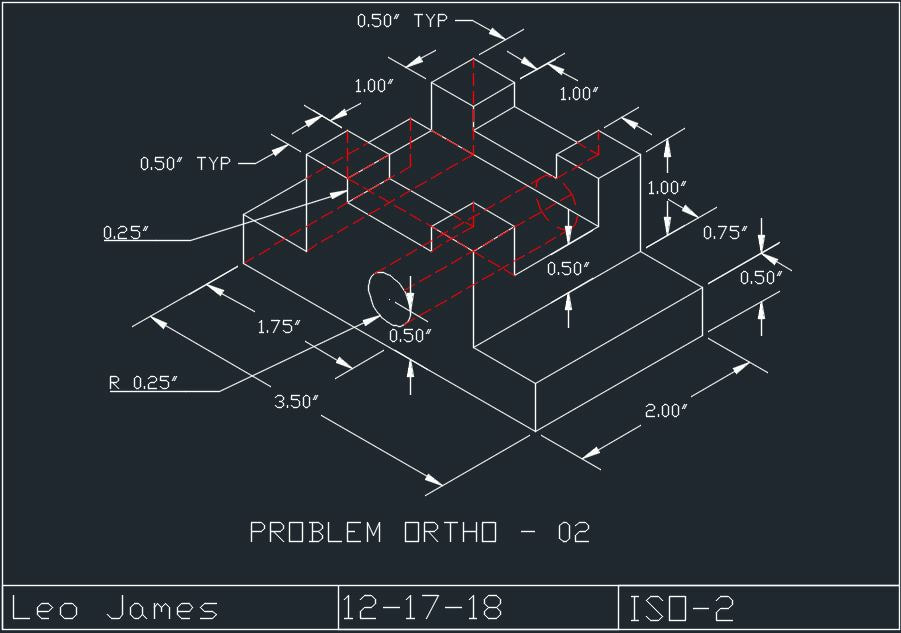
Isometric Drawing 1
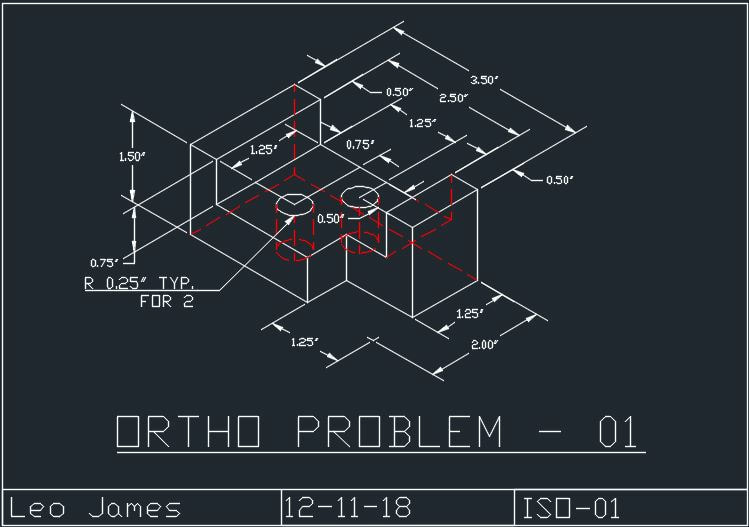
This was the very first isometric drawing we had to draw. As such, we had to learn how to think in 3D and get used to drawing straight lines on the 30 and 150 degree angles. We also had to learn an alteration of the circle command, the isometric circle command. This is used to input circles at the 30 and 150 degree angles, as to appear flat on the isometric drawing. We also learned how to work with different layers, as such to create separate layers for shown vs. hidden lines.
Isometric Drawing 2 and 3
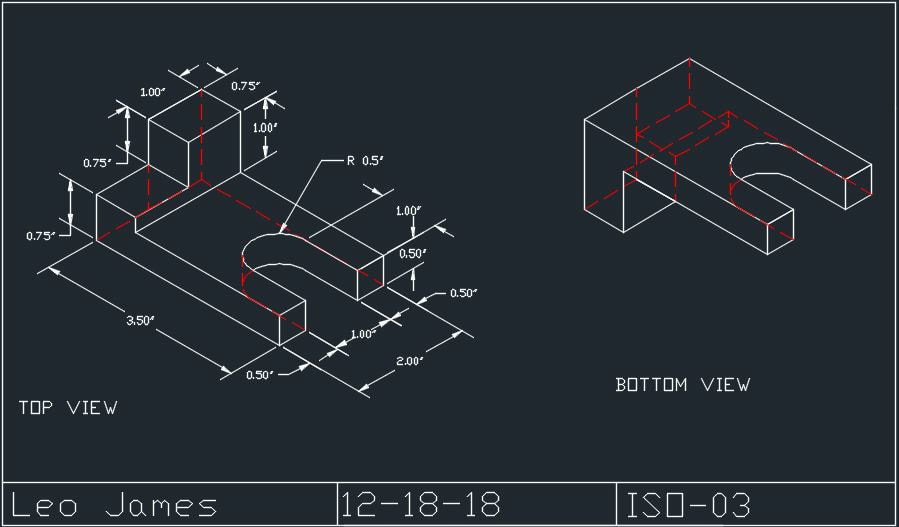
Drawings 2 and 3 introduced a few new commands. Drawing 2 was more so just a further development of drawing 1. Drawing 3, however, reintroduced the trim command into the drawing. It's necessary to trim the isometric circles in the drawing in order to create a smooth, tangent circle. We also had to learn how to trim circles themselves in order to correctly illustrate which parts of the circle are hidden vs. seen. Isometric drawing 3 introduced a whole new idea to isometrics, a bottom view. In order to complete a bottom view, you must visualize the part by flipping it along an imaginary center line going through the part on the 15o degree angle.
